The pick step in the requisition filling process allocates inventory items to the departments that ordered them. You can direct the system to create pick lists automatically when you release an approved requisition. However, in some cases, it may be necessary to create pick lists manually. You can easily generate manual pick lists in the system, based on criteria that you specify. You can print the pick list immediately by setting up auto-printing, or print the pick list later. When you finish a pick, you confirm completion in the system.
The role object that controls access to pick lists is "Distribution," minimally set to View.
To build a pick list, the role object "Distribution" must be set to Modify.
To access organization, department, or asset location data, the organization, department, or asset location must be included in a user's data profile.
You can set up permission for auto-printing of pick lists.
When you are finished specifying the types of requisitions that you want to pick, you tell the system to build the pick list. (See Notes.)
For released requisitions, you can have the pick lists routed directly to a local printer and printed. Multiple users can automatically print pick lists on different printers, or on the same printer. This feature must be enabled for your site by the Help Desk. In addition, each user of the feature must have a printer identified in her/his user profile, and an authorization set. Below are steps for users, and setup steps for system administrators.
Note: You cannot use this feature until your system administrator configures your User Profile for a printer and authorization.
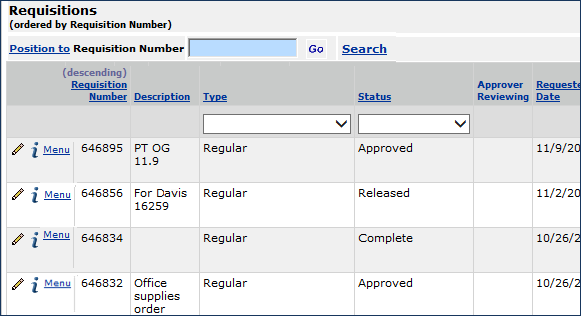
This feature is available for requisitions that you released by clicking the Release Req for Picking prompt next to the requisition on the requisitions list (Figure 1).
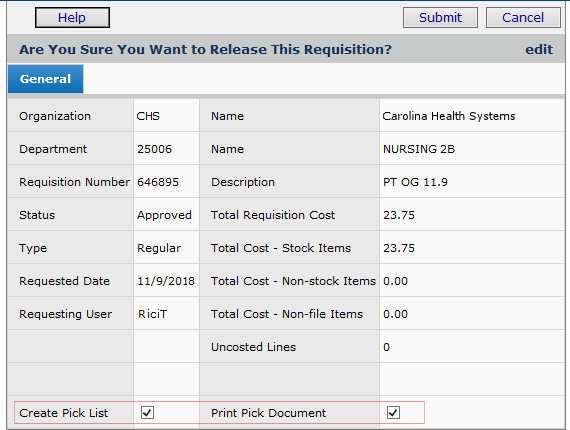
A panel opens for creating and printing the pick list (Figure 2).
The auto print feature runs on an existing client gateway and executes a print command to a defined printer. If your site has multiple networks (for multiple buildings, for example), the "gateway" provided by the Pulse appliance must be running on each network, and printers set up for each network. If you use a single network, pick lists will print at any printer location identified in the client gateway for the single network.
Several steps are involved in configuring this feature. Pulse uses the file type Print PDF which must be configured and enabled for your organization. Also, you may wish to make the feature available only for particular organizations and users. Your scanner must also be capable of outputting scans in Adobe Acrobat .pdf format, and the Printer App Path (the location of the Adobe Reader application) must also be provided. If you can set a User Profile so that the user can print receipt documents, then printing pick lists should also work since it uses much of the same setup.
Important: Call the Help Desk for assistance with setup.
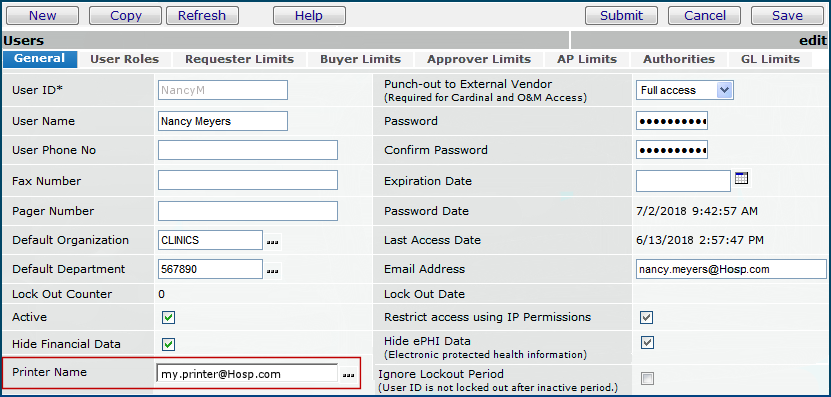
For individual users, two fields - one that identifies the printer and another that authorizes the user -- must be set on the User Profile, as described below.
The Printer Name field on the Users edit panel General tab identifies a printer for the user.
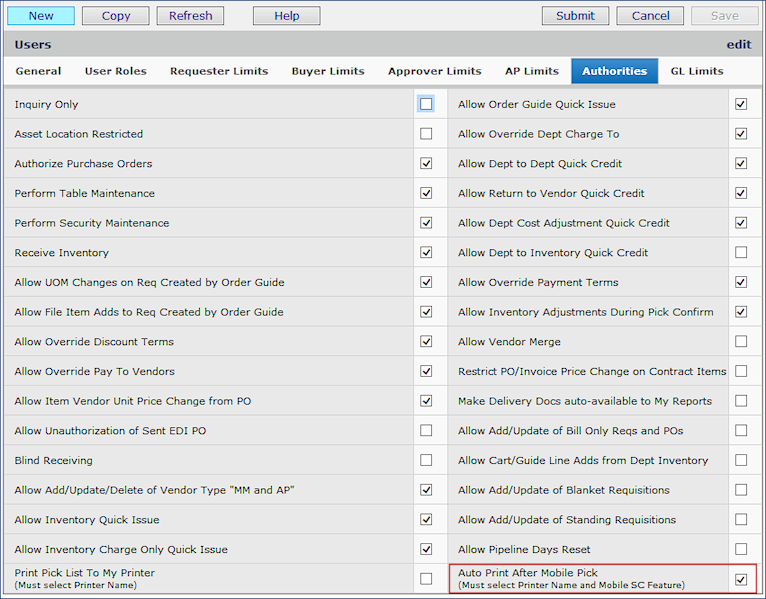
The Print Pick List to My Printer field on the Users edit panel Authorities tab (Figure 4) must be selected to let a user print automatically.

Note: This enhancement is not available for mass requisition releases, requisition imports, etc. Pick lists generated from these functions continue to go to the My Reports list for printing. Also, the enhancement relies on correct Pulse configuration for printing.
In Figure 5, notice that the document indicates the quantities that have not been picked because they have been either backordered or killed.
- Under Items To Pick, the field, BO Kill(ed), indicates whether backorders are allowed for this item (in other words, if the "Allow Backorder" flag was checked on the requisition).
- Under Items Not Picked are also fields for quantities backordered or killed. The Qty Killed field replaces the Qty To Pick column in the Items Not Picked subgroup.
Note: A requisition and its lines can only be on one pick that is In Progress. For example, suppose that two users inadvertently create pick lists with the same requisition lines, and one user begins the pick. When the 'In Progress' pick is processed, any requisitions that appear on other picks are deleted. If all requisitions are deleted, then the pick itself is deleted. A note is written to Warehouse Notifications indicating the deletion of the pick.
When you have finished a pick and issued the items, you need to confirm the pick.
Note: Click View Other Item Allocations to view quantities already allocated for the item. This information can be useful if you need to decide whether to pick the entire requisition, or not.
Note on reusable items: For reusable items, confirming a pick does not reduce the allocated quantity or the on-hand quantity by the quantity confirmed. Department usage is increased by the quantity confirmed.
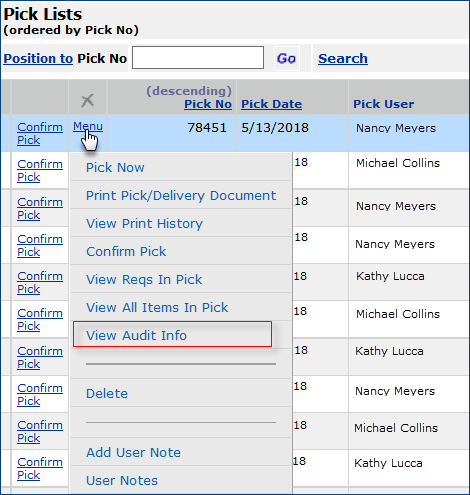
You can view audit information for a pick list via the Menu on the Pick List panel.
An interface to MEDITECH MAGIC permits pick activity to be handled in a hospital's distribution center using MAGIC, with the actual pick activity reported back to the system. The major components include: exporting information about allocated quantities from requisition lines; importing resulting pick information (including picked quantities) from MAGIC into the system, and a report object to print activity. Users of MAGIC who wish to set up the export/import interface should contact the Help Desk.
The import into the system validates the data returned from MAGIC. Pick details with errors (e.g., wrong UOM) are not imported. Rejected lines in the import can be corrected and reprocessed.
Other notes:
From the Materials Management main Contents, select Imports/Exports and Financials > Warehouse Export or Warehouse Import (Figure 7).
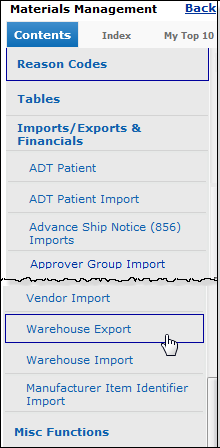
The list of imports or exports appears. Click Help for information on the fields for the lists.
When warehouse export is enabled for a site, a field on the asset location record lets you bypass it (Figure 8). The Bypass Warehouse Export field turns off warehouse export.

When this field is selected,
The mobile Pick Application lets you work with pick lists downloaded from Materials Management onto a mobile device. (Contact the Help Desk if you wish to use the mobile applications.)
With the mobile application, you can review pick list items, enter quantities, and finish the pick. When you finish, the pick is complete, and its status is returned for display on the Materials Management Pick Lists panel.
To work with a pick on the mobile application, you select the supply organization and and asset location on the mobile device and click Start Next Pick. Starting a pick downloads the pick list and locks it for exclusive use on the device.
Figure 9 is an example of a pick list open on an iPad. The display defaults to the first item, and the keypad is open.
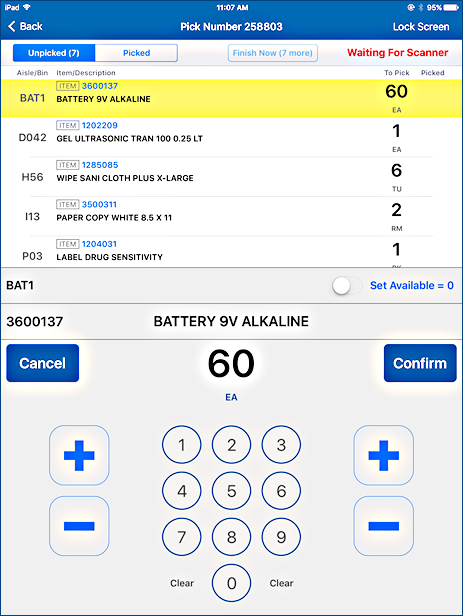
If you wish to use the mobile Pick Application, contact the Help Desk. The feature must be enabled on the server side, and you must set up the iPad. Set up instructions and a user guide are available.
Figure 10 is the Materials Management panel for pick lists, including the pick list in Figure 9 that was downloaded and opened with the mobile application.

The Materials Management Pick Lists panel contains two additional columns when the mobile application is enabled: Mobile User and Mobile Date. Mobile User identifies the user who has downloaded the pick list for work on his/her mobile device. The Mobile Date is the date of the download. The Status column displays Pick in Progress. The Confirm Pick link does not appear. When a mobile pick is completed by a user, the pick list disappears from the Pick Lists panel, just as if it had been worked manually.
Figure 10 also displays the Pick Lists panel Menu. The menu is open for a pick list in progress on a mobile device. Several Menu options are not available when a pick list has been opened in the mobile application: Pick Now, Confirm Pick, Delete.
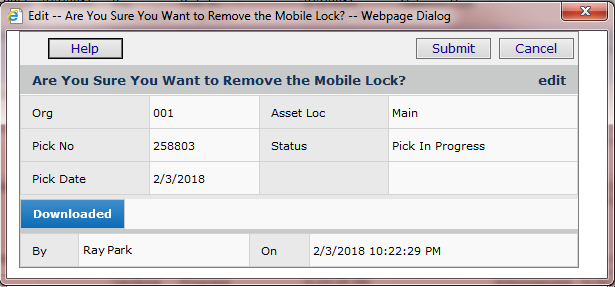
When a user opens a pick list from the mobile application, the pick list is locked for exclusive use on the person's device. That pick list cannot be opened on any other user's iPad and cannot be worked manually from the Materials Management Pick Lists panel.
The system provides the ability to release a locked pick list should circumstances require it. For example, if an iPad running the mobile application is unusable or lost, any open pick list can be unlocked. Once unlocked, the pick list can be either reassigned to a different user on a different iPad, or completed manually from the Materials Management panels. Only pick lists with the Status In Progress can be unlocked.
When a mobile user "backs out" of an open pick to work on the pick later, the mobile displays the button Resume Pick. Tapping Resume Pick lets the user re-enter and finish the pick.
Important: When a pick list is unlocked on the server, the pick can no longer be finished on the mobile device.
Automatic printing of pick lists from the mobile application is similar to printing pick lists from within regular the Materials Management panels. When a pick is finished, if the user is set up for printing, the pick list prints on the user's designated printer. Two setup steps are needed:
Organizations typically have a primary default asset location, but may also be able to draw supplies from secondary asset locations. locations. For par cart and other imported requisitions with items sourced from different asset locations. ERP will automatically build picks for a secondary asset location (and in the primary asset location) for items on a single, imported par cart or other imported requisition. Distribution staff do not need to manually build picks in a secondary asset location.
This feature must be enabled on the Organization record (Figure 13) and on the secondary Asset Location Record (Figure 14).
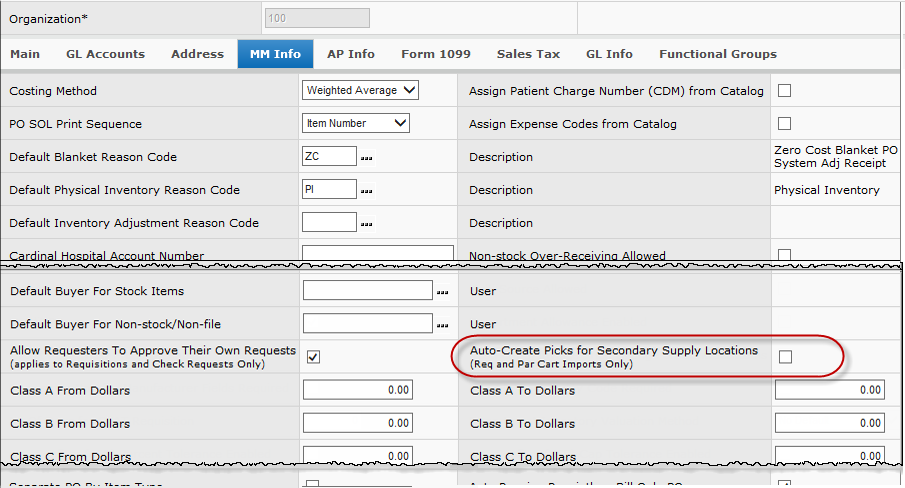
MM or AP main Contents > Tables > Organizations
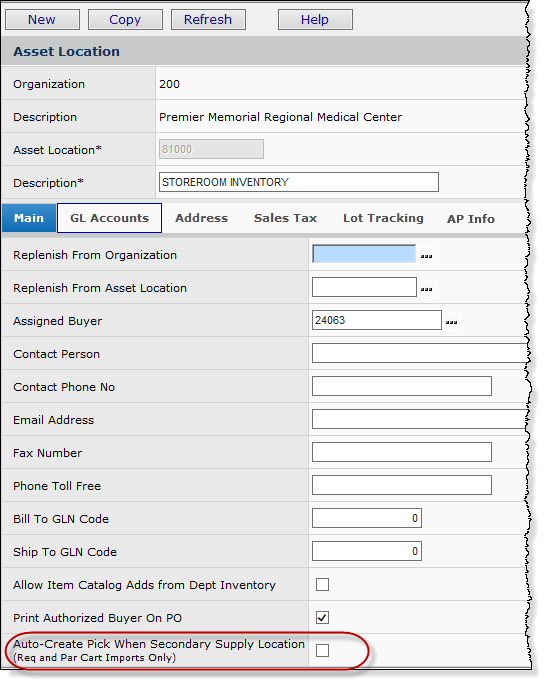
MM or AP main Contents > Tables > Asset Locations
Copyright © 2023 by Premier Inc. All rights reserved.
requsition requistion